 |
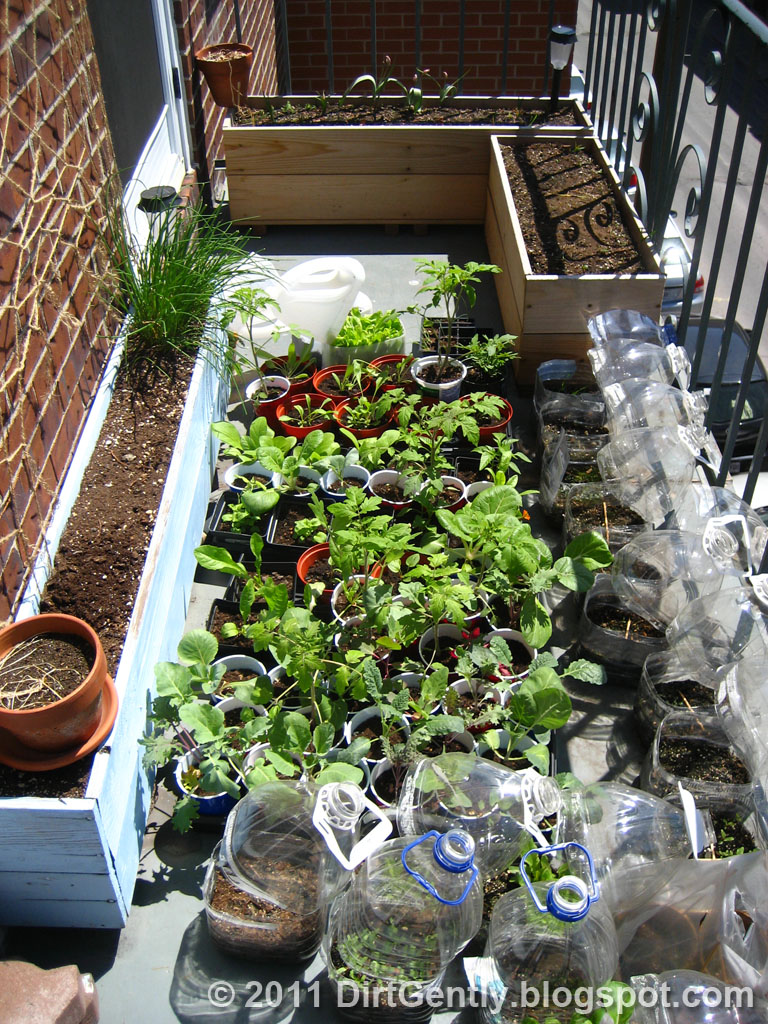
Efforts of previous years and this year's starts. |
Ages ago, an ex-roommate and I built a narrow planter to place against the brick wall of the southwest-facing balcony. We made it out of untreated pine, and painted the outside with some leftover blue bathroom paint. She also wove a net to hang behind the planter for morning glories to climb. I don't think either of us knew what we were doing as far as "proper carpentry" goes, but the planter's still solid after more than five years of all-weather service outdoors.
Last year when I took up container gardening again, I built a couple of cedar planters for bulbs (which mostly failed to come up). And I built another one a couple of weeks ago. Due to popular demand, here are the plans for the last planter I built. Okay, exactly two people, one not in the Dirt Gently universe, asked about the planters in a really offhand way, but this being a blog, I'll indulge my vanity anyway.
 |
| This year's model |
Notes
These plans are for the planter that fills a specific 40x16" space behind the door to my balcony, so there's a moderate amount of leftover lumber in this plan. You can adjust the dimensions appropriately and the lengths of the 1x6s you buy (they come in 4', 5', and 6' lengths at the local lumber yards) to reduce waste.
 |
| Successfully install brass screw. Shiny! |
Keep in mind also that lumber dimensions are nominal: a 1x6 plank is actually a little less than 1" thick and 6" wide. And, depending on various factors like how wet the wood is, the actual actual dimensions of the lumber might not be exactly the same as the supposed actual dimensions. This variation is accounted for on the bottom of the planter by spacing the planks apart for drainage, but you may want to cut the side supports a little shy of 10½" (say, 10¼" inches) to avoid them poking out the top of the planter.
Another thing I learned is to account for the kerf when measuring out the cuts that are made. Measure twice, cut once!
 |
| Irretrievably snapped brass screw filled in with wood putty on the right, boring stainless steel deck screw on the left |
Some notes on screwing. Brass screws look really beautiful against cedar but because brass is really soft, you need to drill pilot holes for the screws and screw them in with the utmost care if you want to avoid snapping them off mid-insertion. I've heard that lubing them up with some beeswax will help reduce the friction and torque that causes them to snap if you screw too hard. Brass screws are also many times more expensive than regular stainless steel deck screws treated for use with cedar, so snapping many of them will hit your pocketbook hard. And removing snapped screws is a pain the butt. This is why I used stainless steel screws in the non-visible parts of the planter. You can use 8x2 stainless steel screws throughout if you'd rather avoid the hassle (although 8x1¾ would be better. With 2" long screws, the pointy end will just barely poke through the other side of the joined pieces and scratch you when you go digging around in the dirt. But I don't think 1¾" long deck screws are widely available).
Note how the screws are flush are slightly embedded into the surface of the wood in the pictures above. This is done by using a countersink drill bit to create a little crater for the head of the screw to hide in.
Finally, each of the vertical supports is the nexus for screws coming at least two, and sometimes three different directions. Make sure that they don't intersect by paying attention to the measurements in the diagrams accompanying each step!
 |
| Snapped brass screws = A fistful of (many) dollars |
 |
| Cutaway of bottom corner or vertical support showing how three different screws are anchored in it in close proximity |
Download cedar planter plans
Edit: Finally managed to figure out how to upload the model to Google Sketchup's 3D Warehouse and avoid the dreaded "401 Unauthorized" error. You can download the cedar planter model here. You will need Google Sketchup or the Google Sketchup Viewer to open the file.Equipment
Eye protection
Measuring tape
Sawhorses
Pencil
Square
Circular saw
Wood clamps
Power drill with socket bit
Countersink drill bit
5/64" or 7/64" drill bit for pilot holes
Beeswax (optional, for lubricating brass screws)
2 2x2 cedar posts, 8' long
7 1x6 cedar planks, 5' long
40 Number 8 1¾" long (8x1¾) flat head socket brass screws
27 Number 8 2" long (8x2) flat head socket stainless steel deck screws for cedar
Enough weed suppression fabric to cover the bottom of the planter
Cut List
6 2x2 at 10½" long (vertical supports)(optionally 10¼" long, see notes above)
3 2x2 at 12" long (cross supports)
4 2x2 at 15" long (planter feet)
4 1x6 at 40" long (planter sides)
3 1x6 at 40" long (planter bottom)
4 1x6 at 15" long (planter ends)
4 1x6 at 15" long (planter ends)
Build instructions
 |
| Planter is 40" long by 16" wide by 11" tall, not including feet. Click to enlarge |
Step 1. Start building one side of the planter by attaching three vertical supports along a 40" long planter side plank as in the diagram below. Use wood clamps to temporarily assemble all the parts first, making sure that everything is square and that the end pieces will be flush. Then drill pilot holes in the plank and the supports, then use the countersink drill bit on the plank, and finally screw the plank to the vertical supports using brass screws (careful! remember forcing brass screws in will snap them!). Make sure that the two supports at each end of the side are ½" in from the vertical edge of the plank; this will allow the face of the 15" long planter ends to be flush with the ends of the planter sides. Repeat the process to build the other side of the planter.
 |
| Step 1: Start building a planter side. Click to enlarge. |
Step 2. Take one of the sides that was built in step 1 and attach a 40" bottom plank to one of sides as in the diagram below. Remember to use wood clamps to pre-assemble, make sure everything is flush, then drill pilot holes and countersink craters. Use the 8x2 deck screws. Note that the screw attaching the bottom plank to the centre vertical support is 19" from one of the screws at the end, and 18½" from the other! Repeat the process for the other side, making sure that when both sides are facing each other like mirror images, the centre screw is 19" from the same side and 18½" from the other!
 |
| Step 2: Add a bottom to the planter side. Click to enlarge |
Step 3. Attach each of the sides with the cross supports as in the diagram below using the 8x2 deck screws. I found it easiest to pre-assemble the whole deal on sawhorses with wood clamps and clamber under to drill pilot holes and insert screws. I find that measuring out where I should drill my pilot holes with all components separate and then screwing everything together afterwards gave poor, imprecise results.
 |
| Step 3: Attach cross supports and planter sides together. Click to enlarge |
Step 4. Unscrew the sides from the whole assembly, then attach the middle plank to the bottom of the planter making sure that everything is square. There should be a space of about ¼" between the middle plank and the ones on either side of it for drainage.
 |
| Step 4: Adding the middle plank to the planter bottom. Click to enlarge. |
Step 5. Starting at one end, remove a cross support. Sandwich one end of the weed suppression cloth between the cross support and the bottom plank. Re-attach the cross support. Repeat for the other two cross supports. Attach the feet to the bottom of the planter (on the opposite side of the cross supports), using deck screws, as in the diagram. The ends of the feet should be recessed ½" in from the edges of the bottom of the planter.
 |
| Step 5: Adding feet to the planter (Viewing planter bottom from the top down). Click to enlarge. |
Step 6. Add the top plank to each side piece as in the diagram below. Use the brass screws.
 |
| Step 6: Adding the top plank to the side pieces. Click to enlarge. |
Step 7. Reattach the side pieces to the bottom piece.
 |
| Step 7: Assembling the side and bottom pieces. Click to enlarge. |
Step 8. Attach the ends with brass screws as in the diagram below. Note that the end pieces may be a tight fit. I managed to gently force them in by hitting them with the fleshy side of my first, but you should probably use a rubber mallet to tap them in: it's a much more refined approach to woodworking.
 |
| Step 8: Assembling the end pieces. Click to enlarge |
Step 9. Step back and pat your self on the back. You have a planter!
 |
| Side view |
 |
| Top view |
 |
| Inside corner view |
 |
| Bottom view (missing a foot!) |
Nice work! I'm especially impressed with the diagrams included with the instructions.
ReplyDeleteThank you! Making the diagrams was the perfect opportunity to learn a new piece of software too. I love how I'm learning new things every day in my gardening journey.
ReplyDelete